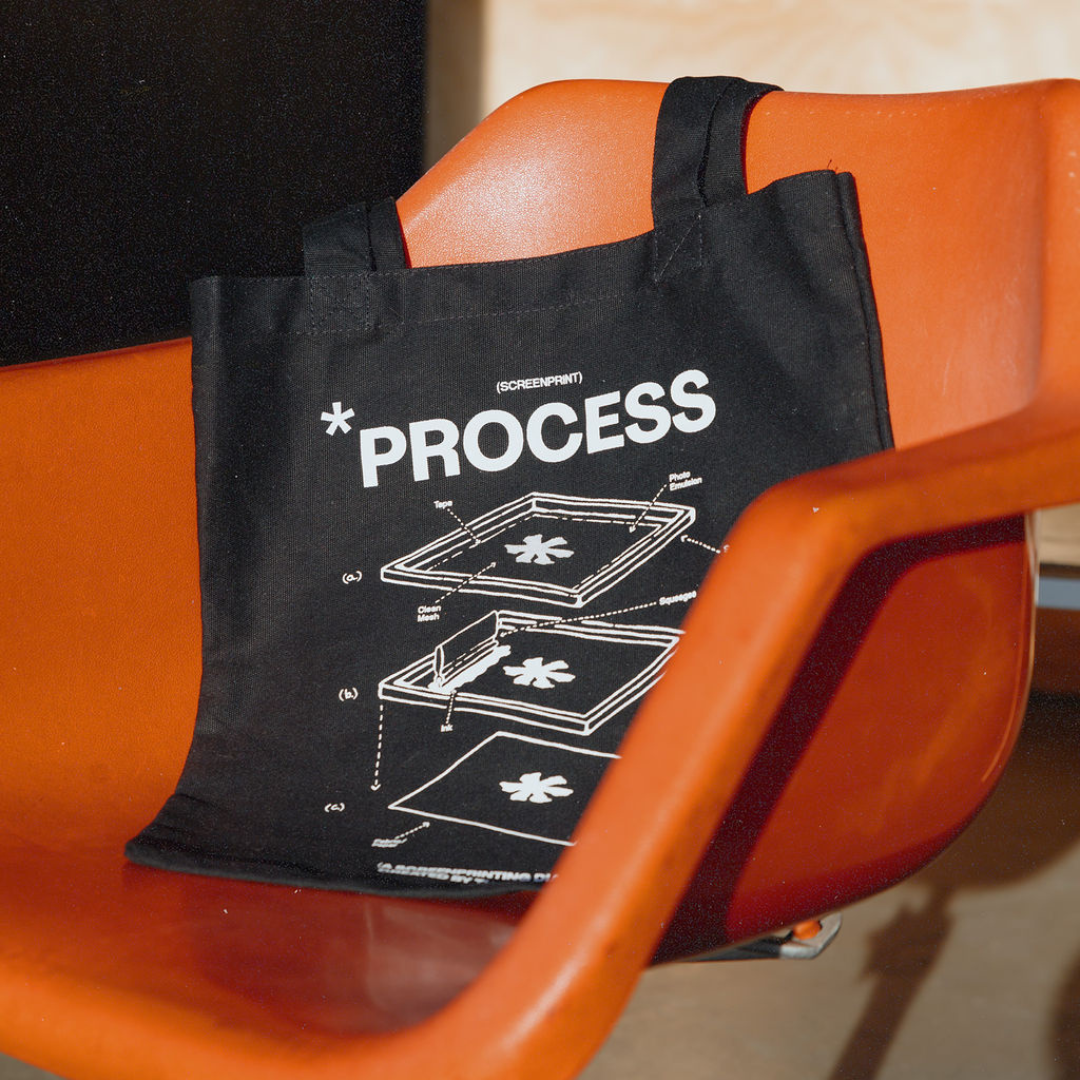
From T-shirt Printing Experts: What Is Screen Printing

From T-shirt Printing Experts: What Is Screen Printing

Maybe you've heard of screen printed tshirts, silk printed or silkscreen printed t-shirts? But not sure what they all mean or the differences between these terms? Well, they all mean the same thing. In the post, we aim to outline a common question for people looking to make custom merchandise 'what is screen printing?' By reading our in-depth post below, you will discover all of the ins & outs of the screen printing process and the benefits of this widely used printing method. At The Print Room, we are expert screen printers. We have been operating for over seven years and work with many of New Zealand's favourite brands. Collectively our team has over 30 years of industry experience and have won numerous awards for our screen printing work. 

If you've ordered with us before, you would probably know that screen printing is our most popular method. If you're new to ordering custom printed tshirts, you should consider screen printing for your next project; it is our recommended decoration type for bulk t-shirt printing. 

Contents 

  • The Background of Screen Printing
  • The History
  • It's Growth
  • The Different Methods
  • The Advantages of Screen Printing
  • The Limitations of Screen Printing
  • Tips on How To Prepare Your Artwork For Screen Printing with The Print Room
  • Use Simple & Bold Graphic Design
  • Use Vector Artwork
  • What File Formats to Save your Design In
  • Choosing the Best Fabrics & Ink Types For Screen Printing
  • Natural (Cottons) & Synthetic (Polyesters) Fabrics
  • Understand The Fabric Thread Count & Density
  • How We Screen Print onto Dark Coloured Garments?
  • Speciality Inks
  • Colours & Their Cost
  • Screen Printing isn't possible without Screens
  • Screen Printing Prep Step-by-Step Guide
  • Prep Step One: Decide on a Screen and Mesh Count
  • Prep Step Two: Cover the Screen with Emulsion 
  • Prep Step Three: Let the Screen Dry
  • Prep Step Four: Create the Stencil
  • Prep Step Five: Expose it to UV Light
  • Prep Step Six: Wash It Off & Repeat For Each Colour
  • The Screen Printing Process uncovered
  • Applying the Design
  • Heat Curing
  • Screen Printing Manually
  • Screen Printing Automatically 
  • Screen Printing Supplies
  • The Myths of Screen Printing & FAQs 
  • The Background of Screen Printing

What Is Screen Printing? — A Lesson in The History of Screen Printing 

Popular opinion suggests that screen printing originated in China sometime between 960 – 1279 AD, in 4th century India or Egypt about 3000 BC. However, the process did not become popular in Europe until silk mesh was easier to import from Asia during the 1700s. Screen printing is often regarded as one of the most versatile printing processes.

In modern times, screen printing is still often the preferred method for bulk printing. There is a wide range of applications for screen printing, which we outline in the next section. 

Screen Printing NZ | The Print Room
Screen Printing on a manual carousel. 

The Growth of Screen Printing

Initially, the method was primarily used to decorate clothing, walls & objects.

It wasn't until the 1800s when it became popular with the advertising world. Later in the 1960s, Andy Warhol used the method to create the famous "Marilyn Diptych" artworks. 

Since then, the screen printing & decorated apparel industry has experienced consistent growth.

Screenprints have become synonymous with pop culture, often seen on movie posters, record album covers, flyers, shirts, commercial fonts in advertising, and artwork. In the 1940s, screen printing became more widely utilised. However, it exploded in popularity from the 1960s onwards as the most common t-shirt printing method. 

Screen Printing Techniques — The Different Methods

As screen printing has been around for a long time, inventors & entrepreneurs have developed sub techniques & new decoration methods to meet customer demands over the years. Depending on your printing requirements, The Print Room can apply one method or another to deliver you the best quality, order volume, speed and appearance.

Rotary Printing

This was a significant improvement in the development of screen printing. Rotary Printing scaled up production levels & sped up the entire screen printing process. In 1960, Michael & Fannie Vasilantone opened a textile printing business called Vastex in Philadelphia; they quickly realised a need for a better way to mass-produce screen printed t-shirts for the growing decorated apparel market. Michael was an engineer and inventor, so they decided to focus Vastex's efforts to create screen printers equipment. One of the machines he developed was a dual rotary printing press, where the print heads and pallets both rotate. 

Vastex' dual rotary printing press revolutionised the industry. His machine works by feeding fabric through sets of rotating print heads and pallets; this allows printing to happen much more quickly than any other method. 

Stencilling

In the past, all the colours were hand-painted, hand-drawn, photocopied or printed (using a computer printer) onto a transparent film. The substrate needed to complete the process needs is made from a material that blocks ultraviolet light (e.g. card stock). 

We have Roy Beck, Charles Peter, and Edward Owens to thank for their work, which has enabled us to recreate photographic style artwork.

In 1910, they were the first to experiment with photo-reactive chemicals like potassium, sodium, ammonium chromate & dichromate. They found that after sensitising emulsions with chromic acid salt, they could create photo-reactive stencils. This enabled us to print more detailed & photorealistic artwork. 

The commercial screen printing sensitisers we use today are far safer and less toxic than we used in the past. 

Digital Hybrid 

It is the daughter of two of the most common fabric embellishment technologies in use today; analogue screen printing and traditional digital direct to garment (DTG) printing. Digital hybrid printing is one of the most significant advancements in the decorated apparel industry in recent years and is still very expensive to invest in. This process combines an automatic screen printing press with a CMYK digital enhancement during one screen printing station. With this method, there is the ability to do variable data, among other things; this puts a whole different level of customisation possibilities at your fingertips. 

The Advantages of Screen Printing 

#1. Vibrant Designs

Screen printing can quickly reproduce more vibrant & bolder colours that are difficult to replicate with other print techniques. For example, direct to garment (DTG) uses thinner inks like cyan, magenta, yellow and black (CMYK) dots to recreate images; these colours have a high level of transparency which means it is challenging to create vibrant prints. DTG printing is excellent for highly detailed art; the results are usually paler than they would be if the artwork had been screen printed.

#2. High Speed & Efficient

Perfect for printing at speed. Once your screen has been made, the screen printing process is the fastest of all the garment decorating techniques. Some screen printing machines are capable of printing up to 1,000 T-shirts in one hour.

#3. Bulk Order Friendly (so call your mates) 

With screen printing, we go through a similar process to print one t-shirt or 1,000 T-shirts, so it's best if you're looking to place a large order. With screen printing, the more t-shirts you order, the lower the cost per unit as the setup costs are spread across more units. Furthermore, screen printing is an excellent option if you print on various garments, clothing, models, or sizes with the same design. 

#4. Incredible Variety 

There is a wide range of screen printing inks that enable us to print different textures and effects onto the garment - we go into this in more depth below. We have a large print area to do oversized prints with our screen printing equipment if you require. 

#5. Best Method For Colour Fastness

We've been printing for many years, which helps, but screen printing inks will wash and well much better than other printing techniques over time. 

#6. Flexible 

It's hard to find a printing technique as flexible as screen printing. Screen printing may be performed on practically any surface, including wood, plastic, metal and fabric — as long as the surface is flat. 

#7. It's a Straightforward Process 

It is a straightforward process that doesn't change, whether done by hand or automated (see the Printing Process Step-by-Step section). The parts required for the equipment are not very difficult to replace and will not get as outdated as quickly as other printing methods. 

Drawbacks of Screen Printing 

#1. High Set Up Costs 

As you will understand, the time we spend printing is substantially less than when we finish setting up the job and making the screens. This, unfortunately, makes for high setup costs for low order volumes. The price per unit is higher when requesting in low amounts, so in some cases, there is a base number of units (things per request) for screen printing. For orders of numerous units, you'll see these arrangement costs even out inside the cost per thing. 

#2. Colours can Add Up 

Incidentally, making a screen for each colour in a design adds up and makes the process more costly if there are many colours. It's best to design artwork with as few colours as possible & to make the art as simple as possible. In any case, our expert team work with you from the beginning to track down that ideal balance. 

#3. Not a Piece of Cake 

It may seem counterintuitive to what we've said above; however, screen printing can be pretty complex; creating a screen requires more steps than other printing techniques. 

Creating Your Best Design

When screen printing, colours are added one by one onto the garment. Our design team re-creates or separates the final artwork into multiple layers to printing it correctly onto the t-shirt.

When sometimes use what is called a "four-colour process". The artwork separated into four colours (CMYK); many designs can be simulated using only four screens, reducing costs, time, and setup.

To get these kinds of jobs done, we usually work with Illustrator & Photoshop.

Keep it Simple

As mentioned earlier, the simpler the design is &, the fewer number colours used often, the better the results will be and also the design will be cheaper to produce. 

Use Vector Art

Rather than saving your design in pixels, we recommend keeping it in vector format. It's easier to deal with for us, and we can scale artwork up or down without any quality loss. 

What Format to Save your Design In

We prefer your file is saved in one of these vector formats; EPS, AI, TIFF, or PSD. These formats allow us to open up the design & edit text or other details within the graphic that need to be edited more easily than pixel-based files (e.g. JPEG, PNG, GIF and BMP).

Note: Remember, if your files weren't saved at a resolution of 300 d.p.i. or better, then we cannot guarantee the result will look as good as it did on the computer. 

Choosing the best Fabrics, Ink & Supplies for Screen Printing

Natural (Cotton) & Synthetic (Polyester) Fabrics

The majority of the fabrics we offer our customers are suited to screen printing.

We recommend that customer choose natural fabrics over synthetic ones. Natural fibres tend to print better and are better for the environment than synthetic fibres. The most common natural material to choose is cotton. Ideally, you'd want to select garments that are 100% cotton, organic cotton or the highest percentage you can budget for. 

Standard cotton is the usual choice for the screen printing industry. The fabric is cheap, durable, prints well with screen printing & are often ordered in large quantities.

Ringspun cotton is the higher-quality & softer touch option. It's more expensive but is perceived as trendier & more luxurious.

We recommend you avoid choosing shiny & thin fabrics because they don't absorb the ink and cotton. Suppose you do choose a lighter T-shirt. We will match the appropriate ink (s) to make sure your design pops! 

"Cotton blends" have the same printing issues like 100% synthetic fabrics do. 

If the garment you like isn't available in 100% cotton, then we suggest opting for polyester with a percentage of 10%, 20%, 30% to make up the blend. Polyester is an artificial fabric, but it's the best option to blend with cotton for screen printing. Polyester will also provide the garment with more flexibility and breathability. When printing onto polyester fabric, we must print a blocker screen to stop any dye migration that might occur when the paint is cured in our dryer. 

Understand Thread Count & Fabric Density

T-shirts with a higher thread count are softer & tend to print best because the fibres are more tightly woven (denser). Density or the garment GSM is a good indication of the garment quality & durability. Not weight. Be conscious that the heavier a fabric is, it doesn't mean it will support the design you've created better than lighter fabrics. It's better to use the proper thread count and density.

How We Print onto Dark Coloured Garments?

We use the same process but place an extra layer of white ink as a base before the printing process begins. That way, the colours from the artwork will neither vanish into the dark fabric nor appear pale. This is called an under the base.

Inks are made to Impress.

Aside from the standard inks, we have a variety of speciality inks in our arsenal. Below we outline a number of the different ink types.

The most common ink choices are plastisol inks and water-based inks. The difference between the two is that water-based inks have a more natural appearance & are less chemically created. Also, the printed garment feels softer in the end. We no longer print with plastisol inks because we prefer the feel of water-based inks and that they are better for the environment. 

Here's a breakdown of our regular options in order of popularity:

  1. Plastisol inks are the most commonly used ink type because they give off good colour capacity, a clean finish and are easy to print. The finish does have a plastic feel to it, hence the name, but it's a very durable choice. 
  2. Water-based inks They are the second most used Ink and our Ink of choice. The result is a much softer feeling print than plastisol inks.  
  3. High-density inks give you a raised print & texture — almost like Braille. The finish is about 3mm above the fabric and is best applied when working with a lower mesh count.
  4. PVC and phthalate-free inks are the newest members of the bunch. They eliminate using the two main toxic components in plastisol ink.
  5. Nylobond is an ink additive used when we need to print onto technical or waterproof fabrics.

If you want your t-shirts to stand out from the crows – then suggest using some of the following inks:

  • Glow in the dark inks achieves precisely what it says – a glow in the dark print. 
  • Glitter/shimmer inks are created by mixing gold or silver flakes with one standard ink range.
  • Puff ink, a.k.a. expanding ink, are an additive containing a foaming agent that reacts to heat & forms a raised — almost 3D like print. They're ideal for fashion, streetwear and other apparel. 
  • Metallic inks are similar to glitter, but the shining and sparkling particles are smaller and more subtle. 
  • Reflective ink is highly reflective, similar to the silver stripes on hi-vis workwear. 
  • UV glow inks and photochromic inks change colour when exposed to UV light. After printing the inks, your design will appear off-white until it is under UV light, and after, it will reveal the chosen colour. Perfect for blacklight parties!
  • Gloss inks create a shiny finish. We print a clear base over previously printed inks, and the result is similar to a laminated print. 
  • Foil refers to a special process in which we heat presses a "thin sheet of reflective material" permanently onto fabric.
  • Discharge inks use Zinc Formaldehyde Sulfoxylate to cause the dye in the printed fabric to discharge (for example, the navy in a navy T-shirt) back to the original garment colour. Discharge only works on dark coloured fabrics that are 100% cotton. Discharge inks come in both clear and standard colours. We use a ZFS-Free Ink.
    • Discharge printing is especially effective for distressed prints and under-basing dark garments that need multiple ink layers printed. It gives an image that naturally soft feel.
  • Cracking ink, cracks or peals on the surface of the print after drying. Standard inks should never crack after printing, but it's because the ink hadn't been cured fully if it does occur.

Screen Printing Is Impossible Without Screens.

A screen printing screen is made by stretching a piece of mesh over a metal or wooden frame. If there is no tension in the mesh, the print results will be poor. Usually, the mesh is made of nylon or another synthetic polymer, while the frame could be wooden or made of aluminium — depending on the sophistication of the machine. 

The screen size we use depends on the item we're printing. Larger screens are used for tea towels and oversized prints. 

Screen Printing Preparation Phase – Step-by-Step

Ever wonder what happens behind the scenes at printing facilities? 

These preparation steps for screen printing come after the design has been adequately prepared in vectors, saved in either one of the correct formats (see What Format to Save your Design). A designer from our team has created a version of your solid design black. 

This solid black version will be printed on a transparent film to block off the light. We clue you in on why it's necessary for STEP 4: Create the Stencil

Prep Step 1: Decide on a Screen and Mesh Count 

After the artwork is all ready to go, a screen and a mesh count is selected by our team. 

Depending on the detail of the artwork being printed, we need a specific mesh count. A higher mesh count is better for printing finer details.

In NZ/UK/Australia, the mesh count measures the total number of threads per cm. Screens with a low mesh count have a wider opening that allows more (and bolder) ink to flow through, and a hold will also hold more Emulsion. Screen printing onto darker coloured fabrics is also more accessible when using screens with a lower mesh count. 

Here's an approximate guideline for different mesh counts:

  • 24-43T mesh count screens are perfect for glitter or shimmer inks.
  • 34-59T mesh count screens can create block numbers and letters like athletic jerseys.
  • 34T mesh count screens are commonly used to print heavy under bases and puff, a.k.a expanding inks.
  • 68/77T mesh count screens are the most versatile and the most popular in screen printing on average.
  • 90T mesh count screens are ideal for printing somewhat detailed images in light inks onto dark fabrics.
  • 120T mesh count screens will leave you with softer results, yet the prints will appear less bright or vivid than artwork printed using lower mesh counts. 

Prep Step 2: Coat the Screen with Emulsion 

Next, the Emulsion is prepared & mixed correctly. When ready, the screen mesh is coated with a photosensitive emulsion. This creates the coloured background (depending on the brand you use, the Emulsion could be green, red or maybe silver). You may have noticed this before on a screen.

The three main types of Emulsion: 

The emulsion is chosen based on several factors; the required level of viscosity, resistance to water and solid contents necessary to produce the best stencil. 

#1 Diazo (ingredient: benzene diazonium)

Popular with new printers because it's cheaper & more forgiving. These emulsions need a longer exposure time (about 15 minutes more) to cure completely and need to be manually mixed. They are not ideal for detailed prints or halftones because Diazo stencils usually are thick.

#2 SBQ-based (ingredient: Styryl Basolium Quaternary) 

No mixing is required, but cautiousness is. These emulsions cure extremely quickly, within seconds, when exposed to UV light. SBQ-based Emulsion is the most expensive option because it allows for more detailed work to be created. SBQ-based Emulsion has delicate bonds that make a thinner stencil; However, we can apply multiple coats if a thicker stencil is needed.

#3 Dual-Cure Emulsion 

Are a combination of Diazo and SBQ that require mixing. Dual-cure Emulsion sits in the middle in terms of cure time (less time than Diazo), price (cheaper than SBQ) & thickness of the stencil (thicker than SBQ).

We expose the screens for longer to the UV light when exposing a lower mesh count screen, allowing the emulsion coating to set and avoid pinholes properly. High mesh count screens need less Emulsion and less exposure time to cure.

Prep Step 3: Let the Screen Dry 

The screen must be left to dry in a warm, dark room for the photosensitive Emulsion to work correctly. If your screen gets exposed to light (Prep Step 6) too soon, you will have to restart the process.

Prep Step 4: Create the Stencil 

A stencil is created by blocking off parts of the screen in the negative elements of the design. You are making an outline of the design on the substrate for the ink to pass through. 

Once the screen is dry, the stencil is taped to the screen and is placed under a strong source of light or exposure unit. 

Prep Step 5: Expose it to UV Light.

Once your artwork is ready to go, we place it in our exposure unit and exposure the screen for around 30-90 seconds.

When UV light hits the Emulsion, a strong bond is formed between the Emulsion's photosensitisers and its resins. The parts of the screen where there is no artwork will harden while the areas covered by artwork will remain soft.

Prep Step 6: Wash It Off & Repeat For Each Colour

Afterwards, we wash the screen off using a pressurised hose and water. 

As the water washes away any soft emulsion where the artwork was on the film, you are left with a negative stencil on the mesh.

If your design has multiple colours, the process is repeated for each colour into individual layers on separate screens. For example, if your design has two colours, we'll need two screens.

Screens can be used again for future printing jobs if they have been cleaned properly. They might get stained over time, but these colours print onto the garment.

The Screen Printing Process 

The screen printing process is relatively simple and is available in both manual and automated versions. It is utilised by professional and hobbyists alike to get images printed onto garments. It's one reason it has existed for so long, but that doesn't mean it doesn't have a learning curve. 

Applying the Design 

Now that the design, screen and stencil have been prepped, it's time to start the printing process. 

Whether the print job is done by hand or with an automatic machine, the T-shirt must be placed on a flat surface like a table or the carousel's pallet. A layer of ink is spread over the artwork on top of the screen, starting from the bottom and upwards to fill the stencil within, either using a flood bar or squeegee if printing manually. 

Now we transfer the ink through the screen and onto the garment using a squeegee. The tension in the mesh pulls (snaps) the mesh off the apparel, leaving the positive image on the substrate surface.

If printing by hand, the screen printer must be careful with the pressure & the amount of ink they apply, so it comes out evenly. The most popular press techniques are flatbed, cylinder & rotary; these are available in manual or automatic screen printing presses.

If the design contains multiple colours, the process is repeated for each colour. It is possible to reuse the screens (after they've been thoroughly cleaned).

Heat Curing The Ink 

Once the garment has been printed, it has to be heat cured to ensure that the print is dried correctly. If you skip this step, your design washes off eventually. During the curing process, the ink must reach a specific temperature to bond with the fabric successfully. Different ink types need to be cured at different temperatures & for various lengths of time. 

Screen Printing Manually 

Whether we print manually or automatically, we have to use a screen printing machine. Screen printing machines come in manual (a.k.a. hand carousel), semi-automatic (clamshell flatbed printer) or fully automatic (automatic carousels), and are the most effective way to print multiples of your design onto garments. 

Screen Printing manually simply means that a press operator will do the following steps by hand: 

  • Spread the ink onto the screen
  • Lower the screen onto the garment
  • Pushing/pull the squeegee over the screen
  • Raise the screen & rotating the carousel (if applicable)

Only 1-2 people must complete each step manually, and it's popular for new printing companies. Larger shops usually keep a manual machine on hand to do small orders, speciality print jobs and garment sampling. 

Limits to printing manually are faced when demand is outpacing production and when the quantity to fulfil an order is physically impossible to take on within the time constraints. In either of those instances, it is best to move to an automatic carousel; we did this several years ago to ensure we could keep up with the demand for our services. 

Screen Printing Automatically 

Most screen printing companies will decide to use a semi-automatic or fully automatic printer with rotary screens to speed up the production process. 

Except for loading the ink into the screen, loading & unloading garments, everything else is automated; 

  • Lifting & lowering flood bars and squeegees
  • Rotating and raising the carousel 
  • Moving the print carriage to and fro 
  • Flash drying

Machines are typically powered by electricity & air pressure (pneumatically powered). Only 1 or 2 operators are needed in the automatic screen printing process depending on the printing machine being used and printing job. For example, if the operator can slow the job down enough, only one person is required. Although multiple people work together loading & unloading the machine, production can be much faster on longer production runs.

Screen Printing Supplies

  • A range of garments & other printable materials 
  • Screens
  • Photo emulsion
  • Sensitisers
  • A dark room
  • Transparent film (to print the artwork onto)
  • Pallet or flat surface (to place the garment on top of)
  • Light sources 
  • Pressurised water 
  • Ink
  • Squeegees

To get your design printed on a t-shirt, a good quality squeegee makes all the difference in screen printing. Start by selecting the squeegee rubber for the printing process. As a rule, a softer blade (55 durometers) will deposit more ink, whereas a stiff blade (80 durometers) is better suited for prints with fine details or the four colour process.  

Summary of Screen Printing 

Screen printing may seem like a full-on process, but the ability to reuse screens has made this decoration technique highly efficient and perfect for larger orders. 

It's befitting both artists and business people because of its versatility.

FAQs 

Can I Place a Small Screen Printing Order? 

Yes, as long as you can place an order of at least 24 units. Orders less than 24 units incur far too much setup cost. To screenprint professionally, you need to build the screens and expertly separate colours, among other technical methods. 

How Much Does it Cost to Get Screen Printing on a T-shirt?

The price of t-shirt printing will depend upon several factors, including the number of colours, the garment you're printing onto, how many units you are ordering and if you are using any speciality inks.

Here's an approximate overview of the costs for screen printing at The Print Room:

  • 100x T-shirts with a two colour print onto a good quality T-shirt is approximately $15 +gst per unit
  • 250x T-shirts with a three colour print onto a good quality T-shirt is about $13.50 +gst per unit
  • 500x T-shirts with a four colour print onto the excellent quality T-shirt is approximately $14 +gst per unit

Which Fabric is Best for Screen Printing My Design?

Screen printing is a very versatile printing method. Almost all fabrics can be printed using this method, apart from jackets and products with a lining, where we would recommend embroidery or Supacolour.

How Many Colours Can I Screen Print?

We can print up to 5-colours on our automatic carousel, but we can create a wide range of colours using printing techniques such as a simulated spot process. Remember that dark coloured garments need a white under base layer before printing the design on top. Each additional colour increases the cost because it adds another step to the production process. Our expert team will advise you during the design phase on how many colours are best for your project or recommend switching to another decoration technique.

Are There Extra Fees & Hidden Costs Associated with Screen Printing? 

We recommend touching base with one of our team to get your tailored quote for your order. You will usually get a price discount when you purchase in large volumes. We charge an additional fee if you are changing ink colours but using the same screens; this is called an ink colour change fee. 

How Long Does it Take to Get Screen Printing on a T-shirt?

It usually takes us around 10-15 working days to print and deliver screen printed T-shirts to addresses within NZ.

Does screen printing work on Jackets & Headwear?

Screen printing is highly versatile, so you'll be able to match the right product to your brand in most cases. However, in most cases, jackets, hats and bags are decorated using embroidery because it offers a longer-lasting finish for these garments.

Do I have to Provide Any Supplies Mentioned Above? 

No, we take care of everything to bring your screen printing project to life. 

As you can imagine, screen printing is our most popular print technique, so we thought it was worth educating our customers about the process we perform to bring their ideas to life. In this blog, we have scaled across every corner of screen printing techniques to provide you with an all-access pass to what you need to know! We've delved into its history and popularisation. Divulged the advantages and disadvantages of silkscreen. Touched on the all-important design aspect, but without negating the proper ingredients, such as tools, fabrics, inks and the pros and cons of each. Enjoyed an in-depth overview of the printing process and the technology therein. And topped it all off with a shining finish of myths debunked and a cheeky little FAQ. But as we said, we don't need to convince you of this – the product practically sells itself.

Blog posts

  1. Read more: Chromatic Visuals - Futurism meets Y2K: Screen Printing for OUSA
    Chromatic Visuals - Futurism meets Y2K: Screen Printing for OUSA

    Chromatic Visuals - Futurism meets Y2K: Screen Printing for OUSA

    Futurism meets Y2K, what is this Chromatic visual trend that seems to be popping on t-shirts everywhere at the moment and how did we print it? Chro...
    Read more
  2. Read more: Unearthing the Ultimate T-Shirt: Earth Positive EP19
    Unearthing the Ultimate T-Shirt: Earth Positive EP19

    Unearthing the Ultimate T-Shirt: Earth Positive EP19

    In a world where sustainable fashion is increasingly becoming a necessity rather than a trend, Earth Positive emerges as a beacon of hope. With its EP19 t-shirt, this renowned brand showcases style and comfort and embodies a commitment to ethical and eco-friendly practices that resonate with the modern consumer.
    Read more
  3. Read more: Why we’ve invested in a CTS machine
    Why we’ve invested in a CTS machine

    Why we’ve invested in a CTS machine

    Hey, have you seen our new toy? It came in a pretty big box, all the way from Detroit, USA and it’s a game changer. Welcome… to our new Computer To...
    Read more